Tuesday, August 26, 2014

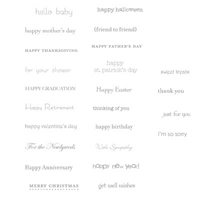
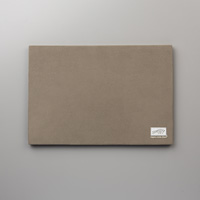
Stampin' Up! Weekly Deals August 26 - September 1

Is it possible to stop the march of time? I sure wish we could! It's so hard to believe that a year has already gone by but our granddaughter, Raine, celebrated her 1st Birthday last week. She is growing up so fast! No more formula for her; she has switched over to milk with no problems whatsoever. Even her bottle has been retired with no backward glances!


However, now when she gets upset, the REAL tears are coming out! Talk about making you melt when you see those babies!

Needless to say, it has been a busy time at our house and I have not been able to devote the time to both crafting and blogging that I had planned. I am ever hopeful that I will be able to develop a more regular routine but baby will still have to come first!

But for today, be sure to check out the products listed below as you can get them for 25% off until September 1!


You also will not want to miss out on the BigShot and BigShot Bundle Deal that ends on August 31. Don't hesitate and miss out on this great opportunity!

Tuesday, August 19, 2014

Stampin' Up! Weekly Deals August 19 - 25

A nice offering of products for you this week! Remember, these products are all 25% off so it's a great time to order them!


Saturday, August 16, 2014

Flower Patch Meets Kinda Eclectic

I was totally inspired by Nance Lempinen-Leedy, a fellow demonstrator, in her combination of Kinda Eclectic and the Starburst Framelits. She designed this little box for the display board at Convention. Isn't it darling?


I love how she got the idea to stamp and emboss the sunburst from Kinda Eclectic and cut it out with the Starburst Framelits. The added twist she used, though, is to cut between the lines of the stamp. Genius!
I applied this concept but paired it with a flower built with stamps from Flower Patch.


Mounting the round flower onto the square mattes works well because circles and squares together are aesthetically pleasing. The sentiment works to balance the square mattes on the rectangular card front.
Here is an angled shot of my card.


This close up shows the dimension achieved by using Dimensionals.


I have been using Fuse Fast adhesive lately, as an alternative to Sticky Strip. There is a learning curve to using this adhesive as it is not as easy to use as Snail Adhesive, until you know the trick! Check out this really good video by Patty Bennett, so you will feel comfortable using it, too!

Thanks for visiting today!


Thursday, August 14, 2014

Flower Patch Revisited

There is nothing I love better than sitting down with my iPad and browsing on Pinterest. It is a wonderful resource, especially if you search for specific stamp sets. One of my favorite searches is for the Flower Patch stamps. There are so many variations!

However, I have yet to see any cards done with gray and black using the Flower Patch stamps. That's what I decided to try today, and I added in a pop of red and green for interest.


In 3 Things To Know Before Using The Flower Patch Stamp Set, I shared that it was important to stamp on top of a piercing mat to get a clean, crisp print. Using this strategy gave me good prints again today.

After stamping all my images, I used the matching Framelits along with my BigShot and Magnetic Platform to cut out my images. I also used my Deco Labels Collection to cut a shape on which to place my flower.

While planning this card, which I usually do using my Silhouette Cameo software, I found that I was unsure which Deco Label Framelit I needed because I did not know their sizes. An Google search helped me locate a wonderful resource from Dawn Olchefske, a fellow Stampin' Up! demonstrator; she provides a listing of all the Framelits and their sizes! You can download the PDF resource from her here.

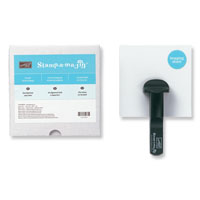
I inked up the label with both Real Red and Tuxedo Black Memento ink and then utilized my Stamp-a-ma-jig to line up the leaf stamp to stamp with the now retired Gumball Green. The flower layers were popped up with Dimensionals as well as the label itself. I used a non Stampin' Up! red ribbon across the Smoky Slate matte and then popped it up with Dimensionals on Basic Black. A Real Red matte was added and then finally a Whisper White card front.

I stamped the sentiment on a scrap of Whisper White and trimmed the ends to make a banner. I inked the edges with Tuxedo Black. My bone folder helped to curl the banner slightly. It was then adhered with Dimensionals.

Here is an angled shot of the card.


I like the contrast of the black and gray with the red and white. What do you think—thumbs up or down? Drop me a comment below.