Wednesday, April 22, 2015

A Sad Goodbye

blogheader_retiredlist15_cust_April2115

Very soon we will bid farewell to a number of Stampin' Up! stamps, tools, colors and accessories. However, until June 2, you have the chance to buy retiring products for up to 50% off, while supplies last! Stampin' Up! has declared this, though:
*Note: Due to high demand for retiring stamps, we'll keep producing retiring stamps until May 26 (not accessories-accessories are only while supplies last).

You can access a PDF of the Retiring Products. Don't wait! SHOP NOW and don't be disappointed!

To view projects made with other retiring products you can view the following blog posts:
Stippled Blossoms Background Technique – Stippled Blossoms stamp set
Remnants of Easter – Naturals White card stock, 2013-2015 In Color Designer Paper Stacks, Simply Pressed Clay, Buttons & Blossoms Simply Pressed Molds
My First Card Challenge – Bigz Autumn Accents
Here's Hoping It's Subtle – Dictionary Stamp
Love For The Lotus – Bloom With Kindness stamp set
Wreath Wrangling – Daydream Medallions stamp set
Watercolor Workout – Flower Frenzy Bigz L Die
My Least Favorite Card To Create – Love & Sympathy stamp set, Mossy Meadow 3/8" Stitched Ribbon
Stampin' Up! Weekly Deals, August 12-18 – Petite Purse Die
It's All About The Sparkle – On Film Framelits
Delightful Dahlias – Regarding Dahlias
Painted Blooms Valentine – Word Bubbles Framelits, Hearts Collection Framelits
Valentine Round Up – Hearts Collection Framelits
Starburst Meets Kinda Eclectic – Starburst Framelits
Hello Mojo! – Starburst Framelits, Sweet Taffy Designer Series Paper
Fusion Card Challenge – Hearts Collection Framelits


Linda Vich Creates: A Sad Goodbye. A watercolored From The Herd image peeks through a circular opening in a Hardwood stamped matte, giving a "barn wood" feel to this good bye card.

Also on the subject of goodbyes is the card I have for you today. An Assistant Manager at the Walmart where I work has just left us for greener pastures so I designed a card for him. The card uses three of the retiring products: Just Sayin' stamp set, Word Bubbles Framelits and Naturals White card stock.

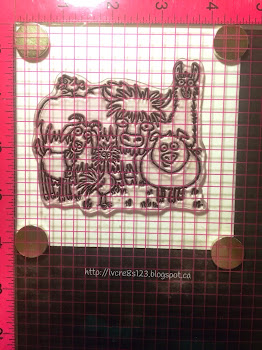
Because I knew the card would be signed by several people, I decided to use the From The Herd stamp set.

I stamped onto the smooth side of a piece of Watercolor paper using Tuxedo Black Memento ink. I allowed it to dry thoroughly while I worked on the front of the card.
Linda Vich Creates: A Sad Goodbye
Using the MISTI to stamp my image.

I knew that I wanted the stamp to show through an opening so I decided to use a framelit from the Circles Collection to cut a hole in a Real Red matte.

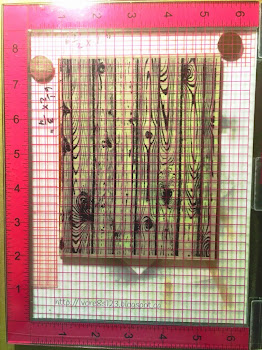
After cutting the hole, I used my MISTI to help with using the Hardwood stamp. Because the stamp was not big enough to stamp the entire matte at once, I needed to be very accurate at lining up my stamp.

If the Hardwood stamp had been photopolymer, this would not have been such a problem. My stamp had actually been a Wood Mount stamp that I had converted to Clear Mount using some of the retiring clear-mount cling foam (I think this may already be sold out, probably to new MISTI owners!). I stamped the stamp onto the sheet from my Stamp-a-ma-jig so that I could use it to line up my matte precisely for stamping.
Linda Vich Creates: A Sad Goodbye
Stamping the Hardwood on stamp on my Stamp-a-ma-jig sheet.


I tested what ink would look best on the red to give a "red barn" feel to the matte. I tested Real Red, Cherry Cobbler and Blackberry Bliss. In the end, it was my favorite, Blackberry Bliss, that won out!

After stamping the matte, I inked the edges using a Sponge Dauber and then set it aside and used many reinkers and my Aqua Painter to color the stamped image. I found that by using an empty Aqua Painter and just dipping into water when needed, I could control how much water I added to my image.

I let the image dry naturally and then adhered it to a 5 x 7" Real Red card base, using Fuse Fast adhesive. I then used Dimensionals to mount the stamped matte on top of the card base, allowing the watercolored image to peek through the opening.

Using Memento ink with a stamp from Just Sayin', another retiring set, I stamped on Whisper White and then die cut using the also retiring Word Bubble Framelits. The sentiment was adhered on the card front with Dimensionals.

Inside the card, I cut and adhered two mattes, (so there would be plenty of room for people to sign the card) from the retiring Naturals White card stock.

For the final touch, I used Memento ink again to stamp one of the Just Sayin' stamp bubbles on Real Red card stock, however, before inking the stamp, I masked out the sentiment it contained using a piece of tape. After inking, I removed the tape and then stamped the word bubble. I then stamped the sentiment, "from the herd" into the stamped word bubble. The word bubble was then die cut using the coordinating framelit and adhered inside the card using Dimensionals, giving a "pop" of red to the inside. (Unfortunately, I had already written in the card before I photographed it so I don't have a photo of the inside.)

Linda Vich Creates: A Sad Goodbye. A watercolored From The Herd image peeks through a circular opening in a Hardwood stamped matte, giving a "barn wood" feel to this good bye card.

Linda Vich Creates: A Sad Goodbye. A watercolored From The Herd image peeks through a circular opening in a Hardwood stamped matte, giving a "barn wood" feel to this good bye card.


I am so glad that I have the retiring Word Bubbles Framelits as well as the Just Sayin' stamp set in my collection. There seems to be so many occasions when these can be used and they worked perfectly for my card! Be sure to get yours before they are gone!

Built for Free Using: My Stampin Blog

Wednesday, April 15, 2015

Stippled Blossoms Background Technique

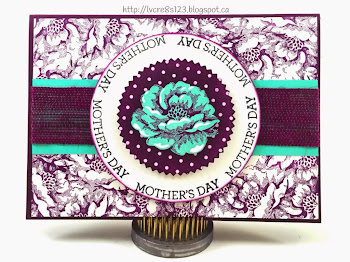
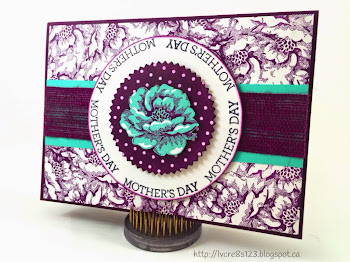
Linda Vich Creates: Stippled Blossoms Background Technique. One stamp from the Stippled Blossoms stamp set is all that is needed to create a fabulous background to showcase a circular sentiment and fussy cut flower on this lovely Mother's Day card.Do you ever wish there were like 48 hours in a day? Maybe even 72? These days, no matter how much I wanted to get in my craft room to stamp, there always seemed to be something else to do. And of course sleeping is an important activity, too!

Anyway, amidst a pile of laundry, and dishes, etc. today, I was finally able to finish the card I started last week!

I had viewed a video by Stampin' Up! Demonstrator Brandy where she created a background by using one of the stamps in the Stippled Blossoms stamp set.

I was in love! Who'd have thought that ONE stamp could create such a lovely design?

I chose to create my design using Blackberry Bliss and my MISTI. Now though I love my MISTI dearly, creating the design could have been done more easily using the stamp on a block but I wanted to see how I could use MISTI to advantage to create the design. I believe I moved the stamp itself about three times in total to create the background, but instead kept shifting my paper in different directions.

After creating my background paper and mounting it onto a Blackberry Bliss card base using Dimensionals, I adhered a strip of Coastal Cabana across the middle using Fuse Fast. Next, I mixed Rubbing Alcohol with a few drops of Blackberry Bliss ink refill in my Stampin' Spritzer and spritzed a piece of the White Jute Ribbon to match my card colors. After it was dry, I adhered it over the Coastal Cabana strip using Sticky Strip.

I next utilized my Pentagon template and circles template (cut with my Circles Collection Framelits) and MISTI to line up the Mother's Day stamp so that I could stamp it around a circle of Whisper White card stock. This is a really cool technique that I was able to do only because I was using photopolymer stamps and the MISTI! You can view three videos by Maureen Wong here that show how to make the templates and how to use them with the MISTI. These will be invaluable to you! Also, you might like to join the MISTIfied Facebook Group to keep abreast of all things MISTI!

After stamping my sentiment on the circle, I inked the edges using Blackberry Bliss and a sponge dauber. I then used the Starburst Framelits to cut a circle from the dotted design from the Irresistibly Yours designer paper. I sponged it with Blackberry Bliss and then wiped the ink off the polka dots. This piece gave me some color and texture to layer onto the circle with my sentiment.

Next, I used Misti to stamp the largest flower from the Stippled Blossoms stamp set using Coastal Cabana for the solid stamp and Blackberry Bliss for the detailed stamp. The flower was fussy cut and then both the sponged starburst and the flower were adhered to the sentiment circle using Dimensionals. The entire sentiment circle was then adhered to the card front using Dimensionals.

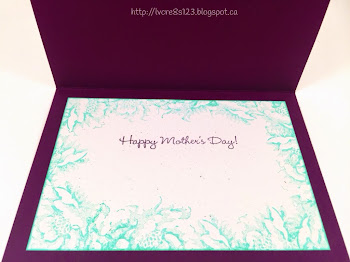
I used a piece of Naturals White card stock to create a matte for the inside of the card. I used the MISTI again to stamp around the create a border around the matte using Coastal Cabana ink. To complete the card, I used Blackberry Bliss to stamp the sentiment from the Sweet Laughter stamp set.

Linda Vich Creates: Stippled Blossoms Background Technique. One stamp from the Stippled Blossoms stamp set is all that is needed to create a fabulous background to showcase a circular sentiment and fussy cut flower on this lovely Mother's Day card.

Linda Vich Creates: Stippled Blossoms Background Technique. One stamp from the Stippled Blossoms stamp set is all that is needed to create a fabulous background to showcase a circular sentiment and fussy cut flower on this lovely Mother's Day card.

Linda Vich Creates: Stippled Blossoms Background Technique. One stamp from the Stippled Blossoms stamp set is all that is needed to create a fabulous background to showcase a circular sentiment and fussy cut flower on this lovely Mother's Day card.

I really like the mix of textures and patterns in this card! If I could change one thing, it would be to have stamped the circular sentiment using Coastal Cabana ink instead of the Tuxedo Black Memento.

I hope you will try the technique of creating your own background paper by using a stamp! Perhaps you will find other stamps that work well for this technique. If you do, please share your findings in the comments below!

Built for Free Using: My Stampin Blog

Tuesday, April 7, 2015

Remnants of Easter

Linda Vich Creates: Remnants of EasterHi Everyone! Hope you all had a good Easter. We had a great day!

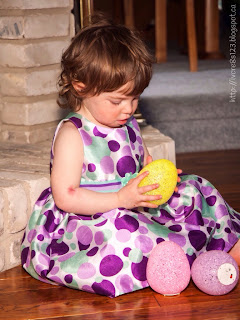
Courtney, Steffan and Raine had been out at Lee River for the weekend but arrived in the early afternoon on Sunday. Raine had slept a bit in the car but not as long as her nap would have been so she was a little out of sorts for awhile.

My husband picked up my mother to bring her over. At first, Raine was scared of her but by the end of the evening, she had given her THREE hugs–unheard of before this!

I tried rather unsuccessfully to get some good pictures of Raine in her fancy Easter dress but she was not happy to be in it and generally let me know that! I did manage three cute shots, even though the backgrounds are not great.

Linda Vich Creates: Remnants of EasterLinda Vich Creates: Remnants of Easter

Linda Vich Creates: Remnants of Easter


We had a nice dinner and then everyone left and it was quiet once again!

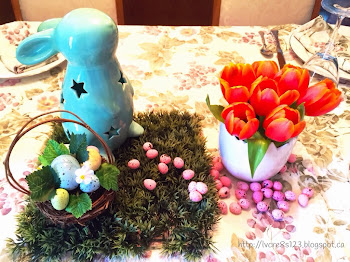
I have my Easter projects to show you today.

Linda Vich Creates: Remnants of Easter


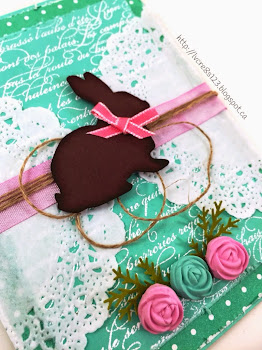
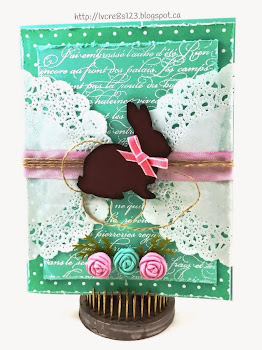
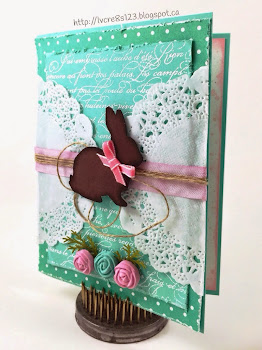
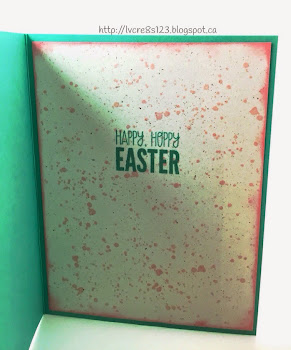
The first card is the one that I made for my mother. It was CASEd from this card. I loved this on sight because of the shabby chic style.

I enjoyed coloring the Whisper White Seam Binding to match my project by using a few drops of Rich Razzleberry reinker with Rubbing Alcohol and then spraying the ribbon with my Stampin' Spritzer.

I also enjoyed using the Simply Pressed clay to create the little roses. I worked a few drops of either Coastal Cabana or Rich Razzleberry into the clay before placing it in the molds.

Besides the items listed below, I used the now retired En Française stamp, Regal Rose ribbon, a leaf punch from Michaels, and the bunny was cut from a Silhouette file using my Silhouette.

Linda Vich Creates: Remnants of Easter

Linda Vich Creates: Remnants of Easter

Linda Vich Creates: Remnants of Easter


Built for Free Using: My Stampin Blog

Linda Vich Creates: Remnants of Easter

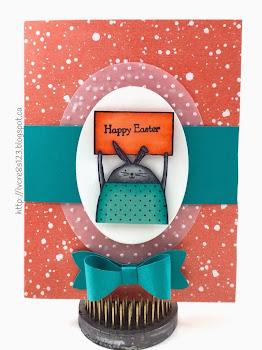
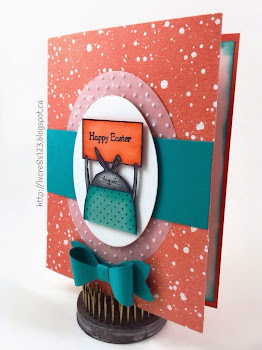
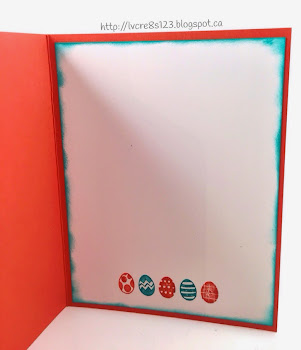
This next card was for my daughter. It was cased from this card. Everything I used is still available with the exception of the paper from the Best Year Ever which was in the Sale-a-Bration catalog.

It was fun to use my Blendabilities to color the little bunny! I will miss these markers when they eventually dry out.

Linda Vich Creates: Remnants of Easter


Linda Vich Creates: Remnants of Easter

Linda Vich Creates: Remnants of Easter


Built for Free Using: My Stampin Blog


For my granddaughter, I CASEd this cute little bunny created with the Curvy Keepsakes Die. I filled the bunny with miniature Cadbury eggs. The only thing that I used not listed below is the now retired Pretty In Pink card stock.
Linda Vich Creates: Remnants of Easter


Built for Free Using: My Stampin Blog

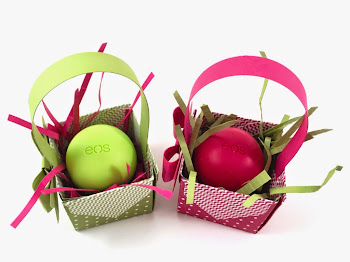
Lastly, I made little treat baskets for my mother and daughter that were CASEd from this basket. I placed EOS lip balms in each basket, matched to the paper colors. The "grass" was created by first crimping card stock and then cutting it with Fringe Scissors.

Linda Vich Creates: Remnants of Easter

Linda Vich Creates: Remnants of Easter


Built for Free Using: My Stampin Blog
I hope you have enjoyed viewing my Easter projects! Now, on with Spring!