I started by die cutting a piece of Watercolor Paper with one of the squares from the Stitched Shapes Framelits. I then stamped the ladybugs using Basic Black Archival ink.
After heat setting the image with my Heat Tool, I colored the insects using a Real Red Stampin' Write Marker. I added a layer of the now retired Crystal Effects and set it aside to dry.
I die cut two more mattes, one from Real Red and one from Thick Whisper White. These were layered with Dimensionals.
The sentiment was stamped on another piece of Thick Whisper White. I then used another technique from Dawn for using a square stitched die to cut a stitched rectangle. The technique involves cutting part of the die, using a cutting pad that didn't cover the die completely. The die was then run through the Big Shot again from the other direction, after lining up the die using the cutting marks left by the die. Great technique as an interim solution but I am hopeful that Stampin' UP! will come out with many more stitched dies, including rectangles and other shapes.
A 5.5 x 5.5" card base was cut from Thick Whisper White. A matte was cut, from the Sending Love DSP, to fit the card front exactly and adhered with Snail Adhesive. A matte was also cut from Real Red.
I used the now retired Diagonal Scoring Plate for the Simply Scored to score the matte at .75" intervals and then turned the matte 90 degrees and scored again to produce the diamond effect. The matte was then folded on all the score lines and then one by one, each fold was inked on both sides with Real Red using a Sponge Dauber. After heat setting the ink, Gold Glitz Dazzling Details was used to add sparkle points to each diamond intersection. I then set the matte aside to dry.
Once everything was dry, I adhered the quilted matte to the card front using Fast Fuse. The ladybugs layer was adhered with Dimensionals on top of the other two stitched layers.
The stack was then adhered to the card front using Dimensionals, with a nest of the Gold Metallic Thread secured underneath. The sentiment was also adhered to the card front. Three Rhinestones were colored with a Sharpie marker and added to the sentiment.
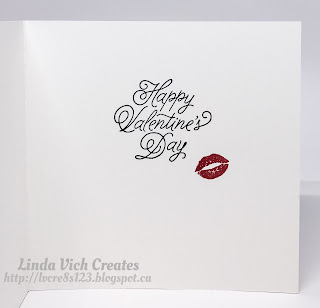
A sentiment from the Sealed With Love stamp set was stamped inside using Basic Black. The lips were also stamped using Real Red to complete the card.
I really like how this card turned out! The faux quilting technique does take some time to complete but I love the way it looks and I will definitely use it again!


1 comments:
Such a sweet, colorful, fantastic creation! I love the way you have focused our attention on your darling butterfly, Linda, and yet, that your papers and other texture elements still get to show off at the same time! Fantastic Valentine! hugs, de
Post a Comment